Ubuntu 10.10 Release Candidate Review

Ubuntu 10.10 (Maverick Meerkat) Release Candidate 
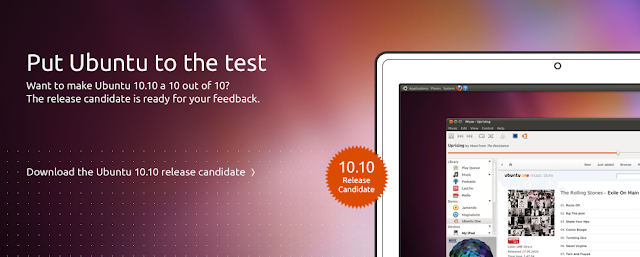
The Ubuntu Developer team has announced that the Last development release of Ubuntu 10.10 Maverick Meerkat is out. Ubuntu 10.10 RC is now avialable for download. It has gone through a lot of improvements since alpha and now its time for the final touches. The Stable release of Ubuntu 10.10 is just 96 hours away !


Download :- 

Lets take a look at the Changes :-


1) Ubuntu 10.10 Gnome :-

  • The GNOME base platform has been updated to the current 2.32 versions. This particularly includes the new dconf and gsettings API. 
  • Evolution was updated to the 2.30 version, which operates much faster compared to the version in Ubuntu 10.04 LTS. 
  • Shotwell has replaced F-Spot as the default photo manager. 
  • Gwibber has been updated to support the recent change in Twitter's authentication system, as well as changing the back end storage to improve performance. 
  • The Sound Indicator has been enhanced to include music player controls. 
  • The Ubuntu Software Center has an updated look and feel, including the new "Featured" and "What's New" views for showcasing applications, an improved package description view, and a "For Purchase" software category has been added. You can also now easily access your package installation history too. 
  • Ubuntu One: Polished desktop integration with new sign up and sign in process. Tighter integration with Ubuntu SSO. Nautilus enhancements for managing folder sync preferences. Faster file sync speed. Share links to music within the Ubuntu One Music Store.
2)Kubuntu 10.10 :-
  • Kubuntu 10.10 RC comes with the latest KDE Software. KDE Platform, Workspaces and Applications were updated to 4.5.1. 
  • For 10.10 Beta, Kubuntu has merged the Desktop and Netbook images into one image featuring both the Plasma Desktop and Plasma Netbook workspaces. The appropriate workspace for your machine will be launched at login, you can also change the workspace in System Settings. 
  • Plasma Netbook now sports the Global Menu by default. 
  • The defaults web browser is now Rekonq, a KDE browser based on Qt Webkit. 
  • The new KDE bluetooth application collection Bluedevil is now installed by default. 
  • Pulseaudio is the default sound server to match other Ubuntu variants. 
  • KPackageKit updates bring a faster backend and an updated UI with an application based view. It also has new features such as a backup/restore tool for the list of installed packages. 
  • Kubuntu's installer, Ubiquity, now offers install of restricted packages during the OS install. Install starts after partitioning making it a quicker experience. 
  • Qapt-batch now replaces install-package as the update/batch-installer utility 
  • Qt was updated to the current 4.7 release and Qt Webkit to 2.0. 
  • Kubuntu Mobile Tech Preview is a new variant with a workspace suitable for smart phones.

3)Ubuntu Netbook Edition 10.10:-
  • The new Unity interface is now the default in Ubuntu Netbook Edition. It includes places for launching applications and browsing files, semantic search through the usage of zeitgeist, optimizing vertical space with a global menu bar and maximizing application by default. A launcher is also available for keeping and dealing with mostly used applications. All favorites from UNE lucid or gnome panel items and desktop shortcuts are automatically transitioned to the launcher on first run.
  • In addition to that, the date and time indicator now has a real calendar widget and is included by default. 
  • The standard photo management application has been switched to Shotwell and UNE comes will all goodness of the Desktop Edition too. Evolution is now performing a special mode more suited for netbook screen size. 
  • UNE needs graphical driver acceleration to be able to run. Otherwise, you should be warned about missing them and will be logout and proposed to run standard ubuntu desktop session.
Installation :-
Installing Ubuntu 10.10 is similar to the previous versions of Ubuntu but its more fun coz of the new Ubiquity Installer with improved looks. Follow the steps here for installation


Desktop :-
Take a look at the Ubuntu 10.10 desktop screenshots :-


Enjoy Ubuntu 10.10 :) 


Howto Manage Hibernate Mode in Windows 7

Hibernation : Hibernate is a feature of many computer operating systems where the contents of RAM are written to non-volatile storage such as a hard disk, as a file or on a separate partition, before powering off the computer. When the computer is restarted it reloads the content of memory and is restored to the state it was in when hibernation was invoked. Hibernating and later restarting is usually faster than closing down, later starting up, and starting all the programs that were running. Going into hibernation requires no user interaction; shutting down when programs are open either requires programs to be closed properly, or user interaction to force them to close, with possible loss of data.

While starting from a hibernated state is usually quicker than starting up and opening all applications, it still requires a few seconds or more, depending on the system's general speed.

To enable hibernation the hard disk must have sufficient free space to store all non-replaceable contents of RAM.

In some cases entering into hibernation can cause incorrect operation on restarting, due to problems with the hibernation software, or with devices or software which is not fully compliant. Hibernate causes connections to other devices to terminate.

If you don’t use the Hibernate option in Windows 7, you can save some disk space by disabling it. Here we will look at a few different ways to manage hibernate options in Windows 7.

Note: Hibernate mode is not an option on systems with 4GB of RAM or more.

Enable or Disable Hibernate Through Command Prompt

Using the Command Prompt might be the easiest way to enable or disable Hibernation. Click on Start and type CMD into the search box and it will be listed under programs. Right-click on the icon and select Run as administrator.


The Command Prompt opens and you will use the following to enable Hibernation.

powercfg /hibernate on


Type in the following to disable hibernation.

powercfg /hibernate off


Manage Hibernation Through Control Panel

Click on Start and open Control Panel then click on Power Options.


On the left side click on Change when the computer sleeps.


Now click on Change advanced power settings.


In the Advanced Power Options window expand the Sleep tree then expand Hibernate after and change the minutes to zero to turn it off. Or you can specify the amount of minutes you want to pass before it goes into hibernation. After you’ve made your selection click Apply and Ok then close out of the remaining screens.


Where is Hibernate option?

What if you try the command line option to turn it on and Hibernate mode still isn’t available? Then what you’ll want to do is disable Hybrid Sleep by expanding Allow hybrid sleep and turning it Off.


Now you should have Hibernate and Sleep as part of the power options in the start menu and will also be an option when you hit Ctrl+Alt+Del.


Enable/Disable Hibernate Through Regedit

Note: Changing registry values can cause your computer to become unstable or stop functioning and is only recommended for experienced users.

Now that the disclaimer is out of the way…you might want to completely disable Hibernate mode through a registry edit. Open the Registry and browse to HKEY_LOCAL_MACHINE \ SYSTEM \ CurrentControlSet \ Control \ Power and change both HiberFileSizePercent and HibernateEnabled value data to zero to disable it and 60 to enable it. After you’ve made the changes close out of the Registry Editor and restart the machine.


If you always turn off your computer or never do, you can disable the Hibernate mode to gain a bit of extra hard disk space. On our Windows 7 (32-bit) machine with a 300GB hard drive, disabling Hibernation gained us just over 3GB of more disk space. That may not seem like much especially with today’s high capacity drives, but if you don’t need Hibernation, why not reclaim that space?

How To Quickly Reboot Directly from Windows 7 to XP, Vista, or Ubuntu

One of the biggest annoyances with a dual-boot system is having to wait for your PC to reboot to select the operating system you want to switch to, but there’s a simple piece of software that can make this process easier.


With a small piece of software called iReboot we can skip the above step all together and instantly reboot into the operating system we want right from Windows. Their description says:
“Instead of pressing restart, waiting for Windows to shut down, waiting for your BIOS to post, then selecting the operating system you want to boot into (within the bootloader time-limit!); you just select that entry from iReboot and let it do the rest!”
Don’t worry about iReboot reconfiguring  your bootloader or any dual boot configuration you have. iReboot will only boot the selected operating system once and go back to your default settings.


Using iReboot : download
iReboot is quick and easy to install. Just download it, link below, run through the setup and select the default configuration. iReboot will automatically figure out what operating systems you have installed and appear in the taskbar. Go over to the taskbar and right click on the iReboot icon and select which operating system you want to reboot into.


This method will add a check mark on the operating system you want to boot into.
On your next reboot the system will automatically load your choice and skip the Windows Boot Manager. If you want to reboot automatically just select “Reboot on Selection” in the iReboot menu.
To be even more productive, you can install iReboot into each Windows operating system to quickly access the others with a few simple clicks.
iReboot does not work in Linux so you will have to reboot manually.Then wait for the Windows Boot Manager to load and select your operating system.
iReboot works on Windows XP, Windows Vista, and Windows 7 as well as 64 bit versions of these operating systems. Unfortunately iReboot is only available for Windows but you can still use its functionality in Windows to quickly boot up your Linux machine. A simple reboot in Linux will take you back to Windows Boot Manager.

Best FOSS for Windows

List of some best free open source software (foss) for windows. These software are licensed under Free Software Licenses . These are really great software & are absolutely free and best alternate to paid software. Feel free to download them all and use them to the fullest.

Follow the link provided and downloaded the software from the page.
1)Browser :-


Mozilla Firefox: It is considered to be the best browser available and is most widely used browser after Microsoft's Internet explorer.


Google Chrome: It has been recognized as the fastest browser and it is the third most widely used browser.

....

Windows 8

In a recent interview, Steven Sinofsky, president, Windows and Windows Live Division noted that there simply was no way of telling how Microsoft would be able to outdo Windows 7 with the forthcoming Windows 8. And yet, a Program Manager on the Windows team, working on Windows Update, published a blog post in which he enthusiastly promised that Windows 8 would end up being completely different  than everything customers expected of a Windows release. While it offered no actual details on the next iteration of Windows, the PM managed to shed light on the enthusiasm that was undoubtedly fueling the people behind the Windows project, as Windows 7 was a smashing success, with over 60 million sold licenses since launch. 
....

top